While I have experimented with slight alterations to this recipe (see peanut butter variation below) the credit for this amazing masterpiece goes to my grandmother, who very kindly shared it with me and allowed me to post it here. I have tried many other versions of chocolate chip cookies and these remain the best ones I’ve ever tasted. I have often been enlisted to make these several weekends in a row when my family and I feel we’ve eaten healthily enough throughout the rest of the week that we can afford to splurge, or for weekend gatherings. We like them several different ways. Some prefer them room temperature, others like them fresh and warm with a scoop of vanilla ice cream, and others like them straight from the freezer. I debate with myself over whether frozen or warm is better—I think frozen may be winning the argument.
Below the recipe I have included some variations, notes, and a list of tips related to this recipe. Sighted readers can of course use the tips as well if needed, but they are written specifically to assist visually impaired readers with a few of the more complicated or visual parts of this recipe, though there are certainly a few universally helpful and practical tips sprinkled among them. As you can see from my page, this is my first recipe post, so if anything seems to be worded strangely or is confusing, please comment below and let me know if there’s anything I can clarify. I’d also love to know if you made this recipe and whether you liked it or didn’t like it. If you find you didn’t like it as much as others you’ve tried, I really would be curious to know your reasoning. And on that note, please enjoy these chunky chocolate chip cookies!
Ingredients
1 cup softened butter
1 1/2 cups packed brown sugar (I personally prefer dark but any type will work.)
2 eggs (room temperature)
1 tsp vanilla extract
2 cups all-purpose flour
1 tsp baking soda
1 tsp salt
3 cups chocolate chips
Directions
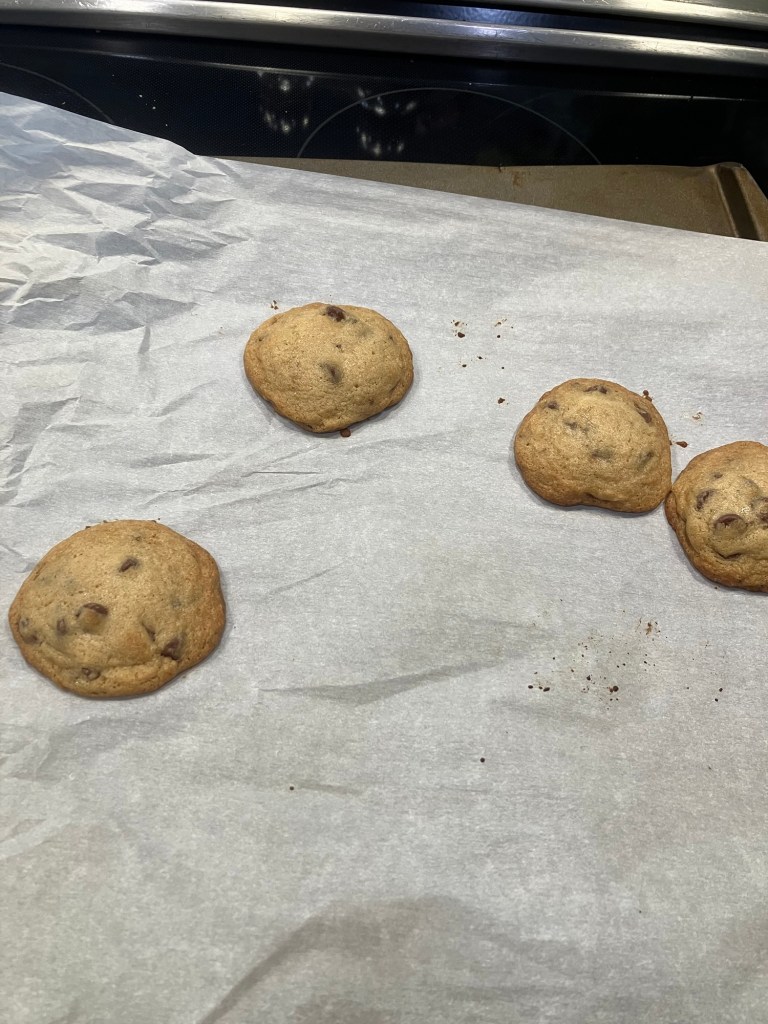
Preheat oven to 375°. With a stand or hand mixer on high speed, Cream butter and sugar together until well-combined; the mixture should have a slightly airy quality to it when tested with a clean finger. This will take between 3-5 minutes. Add eggs and vanilla and beat again for 2-3 minutes to make sure batter is light and fluffy. Add in flour, baking soda, and salt and gently stir or beat on low speed for about 30 seconds to combine. The dough should be soft and moldable but still slightly wet. Gently fold in chocolate chips.Line a cookie sheet with parchment paper and place balls of dough about two inches apart. If your cookies are on the larger side, you may want to spread them out a bit more to avoid them sticking together. Bake in preheated oven 8-10 minutes or until the edges of cookies are just barely set and a light golden brown color. Cookies will be puffy and light to the touch, and will flatten as they cool. The larger your cookies the longer they will take to cook, hence the 2 minute range of time. Carefully slide the parchment paper holding the cookies off of the baking sheet and onto a heatproof work surface (for example, a granite counter). Let cookies cool for about 3 minutes and then transfer them carefully to a cooling rack with a spatula. Let cool completely or serve warm. Parchment paper can be reused to bake the rest of the dough. Store cookies in an airtight container at room temperature for up to a week, or freeze.

Variations
Chocolate Butterscotch cookies: Substitute 1 cup butterscotch chips for 1 cup of the original chocolate chips.
Chocolate peanut butter cookies: Substitute 1/2 cup creamy peanut butter for one of the sticks of softened butter.
Recipe Notes
These cookies are delicious straight out of the oven, but though they assume a different texture once cooled, they are equally good at room temperature. I have actually found that my favorite way to eat these cookies is straight from the freezer, as the chocolate has more of a snap and the cookie has even more of a crunch. Though several variations are listed above, you can get as creative as you want with these cookies—add whatever mix-ins you’d like.
Tips Related To This Recipe
• If you forget to soften your butter overnight before making this recipe, you can microwave the cold butter to soften it. I’ve heard of several different methods for this, but what I do is simply hit the start button, which runs for 30 seconds on my microwave, and pause it every few seconds to check the butter’s progress. If one side becomes soft more quickly, flip it to the opposite side. Be careful that you don’t accidentally melt your butter. I have accidentally done this several times, and most definitely prefer the safer method of leaving your butter out on the counter for several hours.
• Another butter related tip: My kitchen has a granite counter and a wooden island counter. I have found that butter will soften significantly faster on the wooden counter, as the granite does not retain any heat and is always much cooler.
• I am perfectly fine with measuring things like sugar and flour out of a bag, but have found that I much prefer to pour them into canisters. This makes it harder to tip your sugar or flour over and provides a solid material to measure against.
• When I say that eggs should be room temperature for this recipe, I really do mean it. I tried mixing them in cold once and they took quite a lot longer to mix with the rest of the ingredients. If you forget to take your eggs out of the fridge far enough beforehand, place your eggs in a small bowl and fill it with warm water. Your eggs will come to room temperature (or close enough) in a matter of minutes.
• As a blind person, I find vanilla extract rather aggravating and sometimes slightly anxiety-inducing to measure, as it can so easily spill over and has a very strong flavor. I have partial sight in one eye and use it to help me with this, but can do without it as well. Very carefully begin to tip your bottle of vanilla extract toward your teaspoon, making sure both are suspended over a bowl—not the one containing your other ingredients, in case you spill over. Lightly lay a finger across the top of your teaspoon, making sure you don’t block the flow of liquid, and when you feel the extract touch your finger, stop pouring. I tend to go very slow with this process and try to pour slowly enough that the extract comes out in drops instead of a steady stream. Once you have a full teaspoon, carefully empty it into your mixing bowl.
• Especially in the stages before you add the flour, you will want to scrape down the sides of your bowl very frequently. I usually pause halfway each time I beat the batter to scrape down the sides of the bowl with a rubber spatula. Slant the flat of your spatula slightly so that you are scraping with both the flat side and the edge and work your way around the bowl, scraping down the side. You can also use the edge to work sideways around the bowl to catch anything you missed. After each scrape, use the side of one finger to slide the clump of batter off the spatula and into the bowl.
• I often have a difficult time evenly cutting parchment paper. If you are confident in your ability to cut a fairly straight line using scissors, then your way is clear. I like to pull out enough of the roll to cover my pan and have a little sticking out on each end. After doing this, pretend you’re closing the box by sliding the cardboard flap back into place. Carefully pull down on the parchment paper right under the sharp edge, trying not to nick a finger or rip the paper. Sliding it back and forth along the sharp edge can sometimes help as well. I almost never get an even edge out of this, but it is at least relatively even compared to what it would be if you just tried to rip it in a straight line without using the edge of the box.
• You can do your own experimenting with how you scoop your cookies and arrange them on the pan if you’d like. I have a cookie scoop which holds about 1 to 1 1/2 tablespoons of dough, and has two handles that, when pushed together, slide a tiny metal scraper across the bottom of the scoop, popping out a perfect little ball of dough. I like to make my cookies big, as they come out with crispy edges and a gooey center, so I will heap the scoop well over the rim. On my cookie sheet, which is about medium sized, I will do 4 rows of 4 cookies evenly spaced, which ensures they don’t spread out enough to meld into one another.
• Less of a tip, more of a note: there is a difference between a standard baking sheet and a cookie sheet. A baking sheet has four raised sides, while a cookie sheet only has two. You can, however, still use a baking sheet to bake your cookies if you don’t have a cookie sheet.
